|
5. Install the motor
Clean the rotor with IPA. Oiling motor bearing is not recommended but sometimes it is necessary.
In this case, apply only very small drop of oil to the bearing and clean rotor very carefully. Oil should never get near the area where the rotor is in contact with the rubber ring! Repeat the cleaning process until you’re sure that oil can’t get to it.
6. Install the capstan wheel
First, clean the capstan wheel and capstan wheel cover with IPA.
Then remove the old rubber ring and install a new one. Do not glue it to the brass ring.
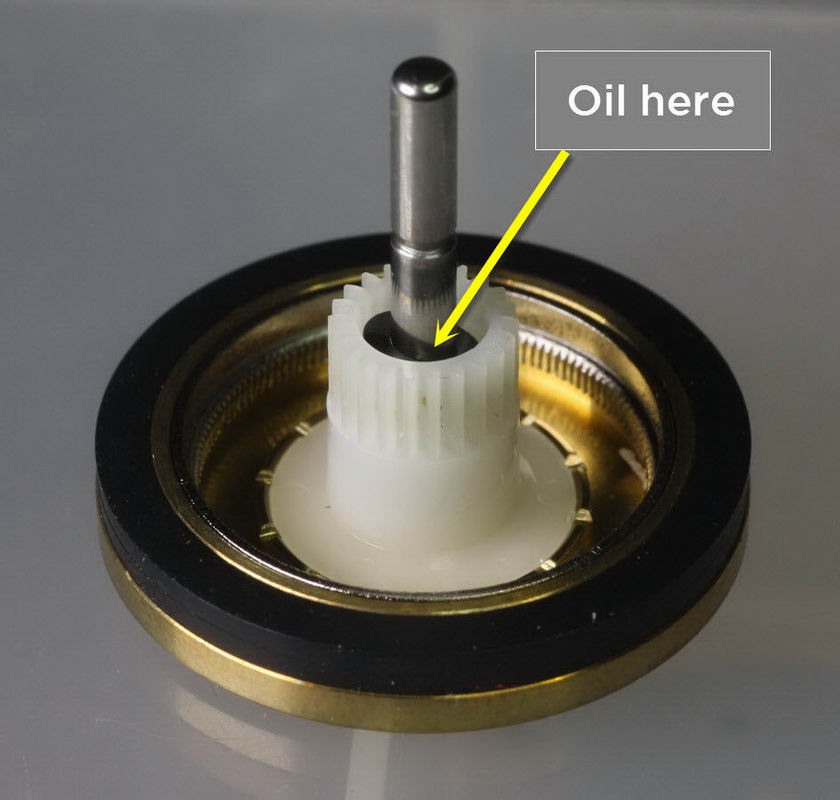
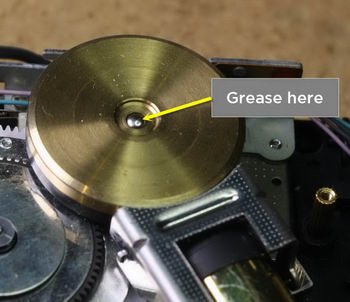
Lube capstan - apply two drops of oil, as shown on the image:

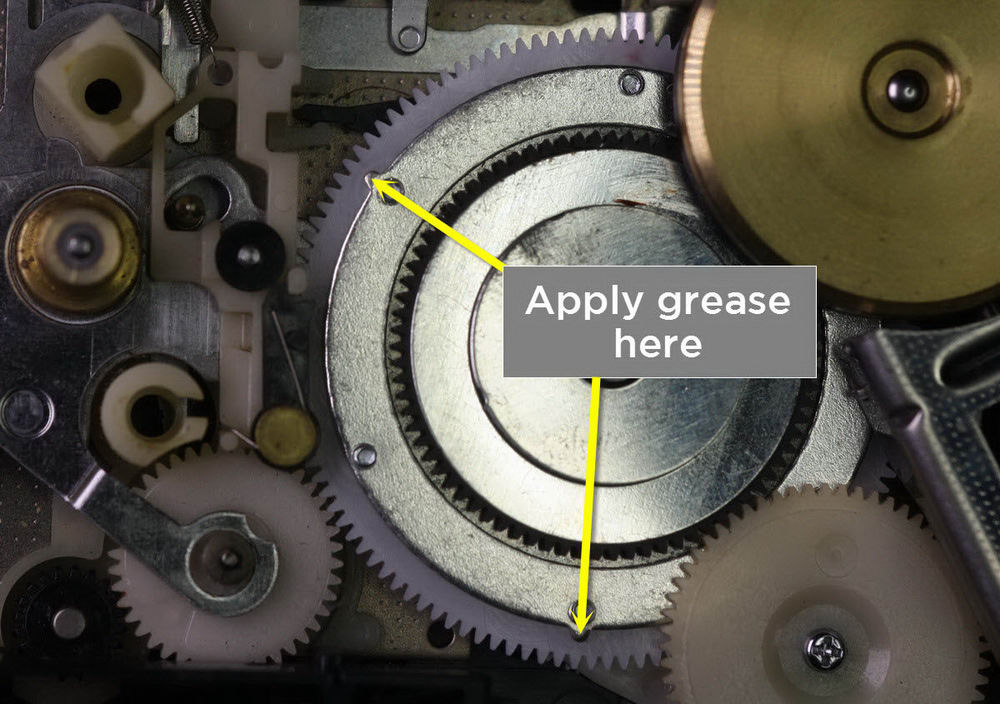
Apply grease to the top of the brass wheel:
Install the capstan wheel cover
7. Insert all buttons. Just push them back in. Be careful, do not forget to install the spring that is attached to each of them. In later DD walkman versions there is also a small plastic ring, do not miss it.
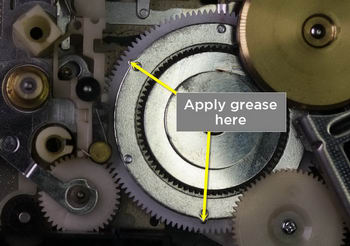
8. Apply grease to center gear - but only to the three nipples as shown:
9. Connect walkman to external source using DC connector.

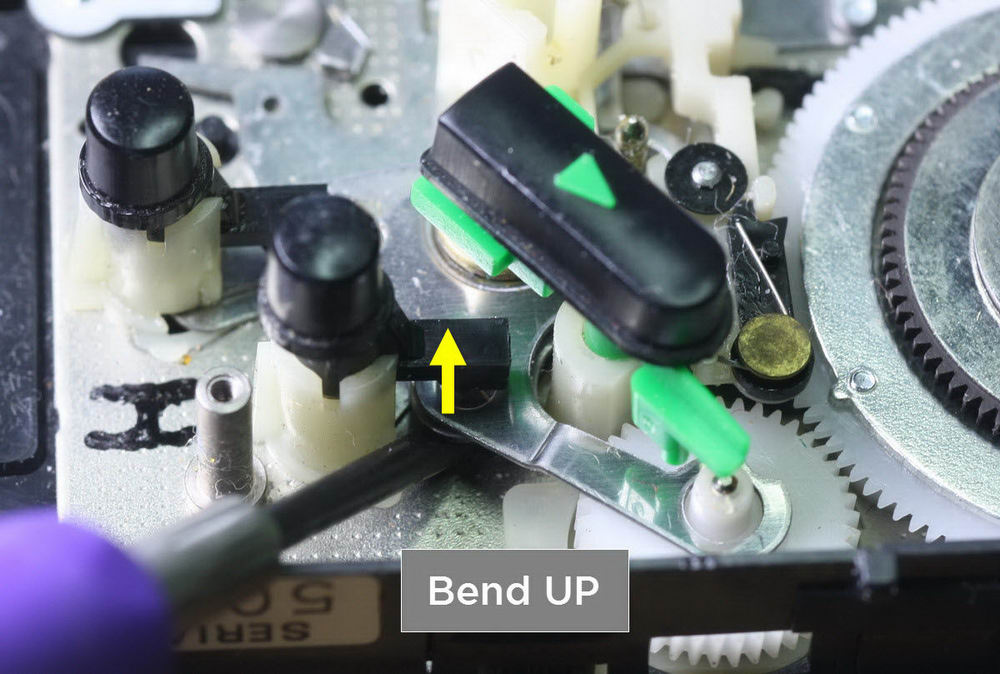
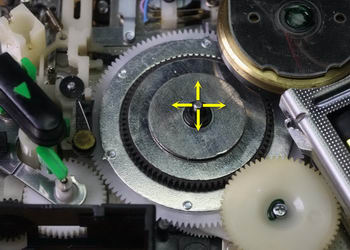
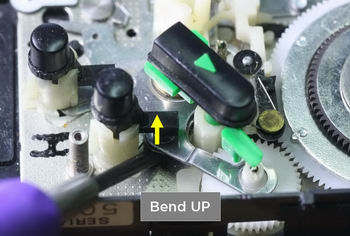
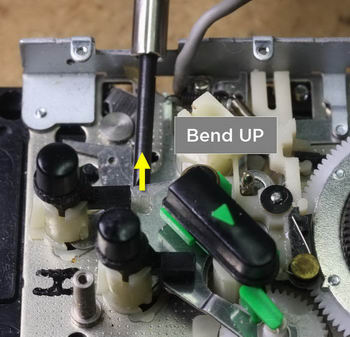
10. Check PLAY mode operation. Push PLAY button and check operation. If the mechanics are very noisy, it is likely that the center gear pushes very tightly onto adjacent gears. Usually, this is caused by a leaning center gear axle. It is a very bad thing, that might happen again, after you’ve corrected it. Probably due to warped material being used. Fortunately, it does not happen very often.
You can correct a leaning axle, as indicated on this image:
11. Check REW mode operation. Push the REW button and check operation. Check it with cassette inserted, and also without. Also confirm operation when the walkman is turned upside down. The walkman must run smoothly, there can be no intermittent screeching sound. If necessary, adjust the center gear arm.
12. Check FF mode operation. Push the FF button and check operation. Check it with cassette inserted and also without. Also confirm operation when the walkman is turned upside down. The walkman must run smoothly, there can be no intermittent screeching sound. If necessary, adjust center gear arm.
13. Install the printed circuit board.
Install it in reverse order. Thread the head wire through the hole in the PCB. Fasten it with screws.
14. Solder head wires.
I use a solder station set to a temperature of 250C. Use non-conductive solder paste. At the end, clean it well with cotton wool soaked in IPA (Do you mean: Clean the tip with IPA? This could be a little clearer, and also include the Fahrenheit value for American readers etc.!!)
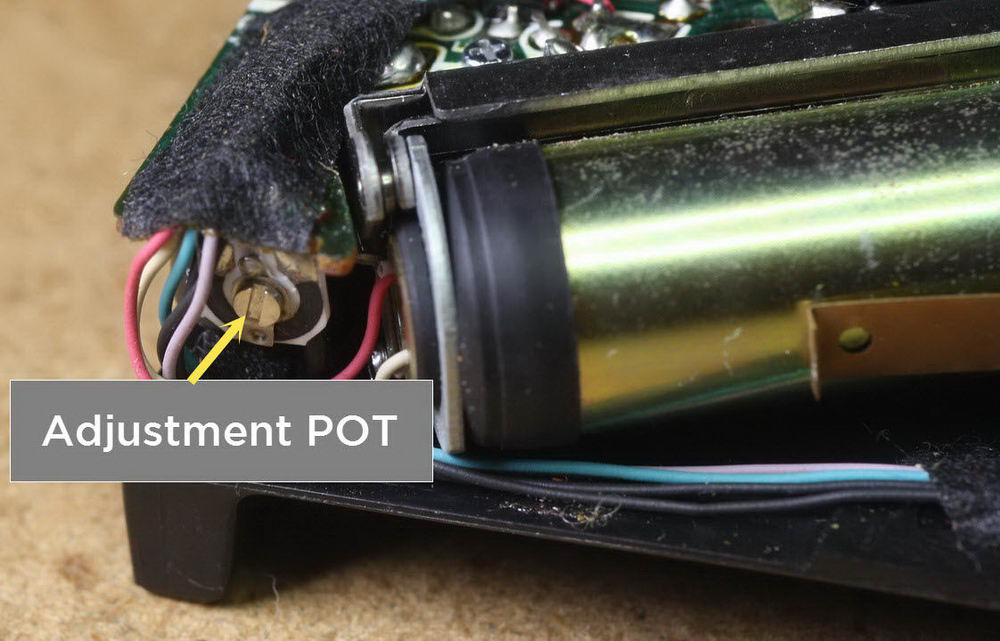
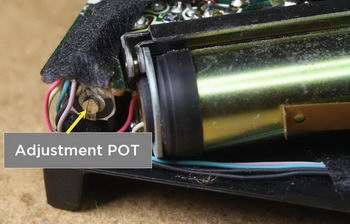
15. Adjust speed if DD is not quartz-controlled
If your walkman is not quartz controlled (all except DD33 and DC2), you need to adjust the speed. It is very probable that after 20-30 years, the speed will be off.
- Get a speed calibration tape or record a 3000 Hz sinus signal on a quartz-controlled deck.
- Use your sound card as input device and connect it to your walkman or cassette deck. Modern sound cards do not have input (only output). In this case, buy cheap USB audio converter.
- For example, ebay search for "ezcap 3.5mm to usb audio converter". There are many, for good price. I think you will find it useful for digitizing your tape recordings, as well.
- Download frequency reader software, for example WfGui
- Find speed adjustment screw (potentiometer).
- Connect your walkman to the sound card, connect the sound card to the PC and run above mentioned software.
- Play the speed calibration tape and adjust the speed using small screwdriver. The frequency reader should show a frequency close to 3000Hz. You will not be able to set it exactly to 3000 because of the wow/flutter of most walkmans. But 3000 plus minus 30 should be OK.
|